
Make pictures and motion for each cut
After the voice, your video is split into cuts. In step 4 you make a picture for every cut, and in step 5 you decide how each picture moves. Every cut needs a picture before you can continue.
Step 4: Generate images
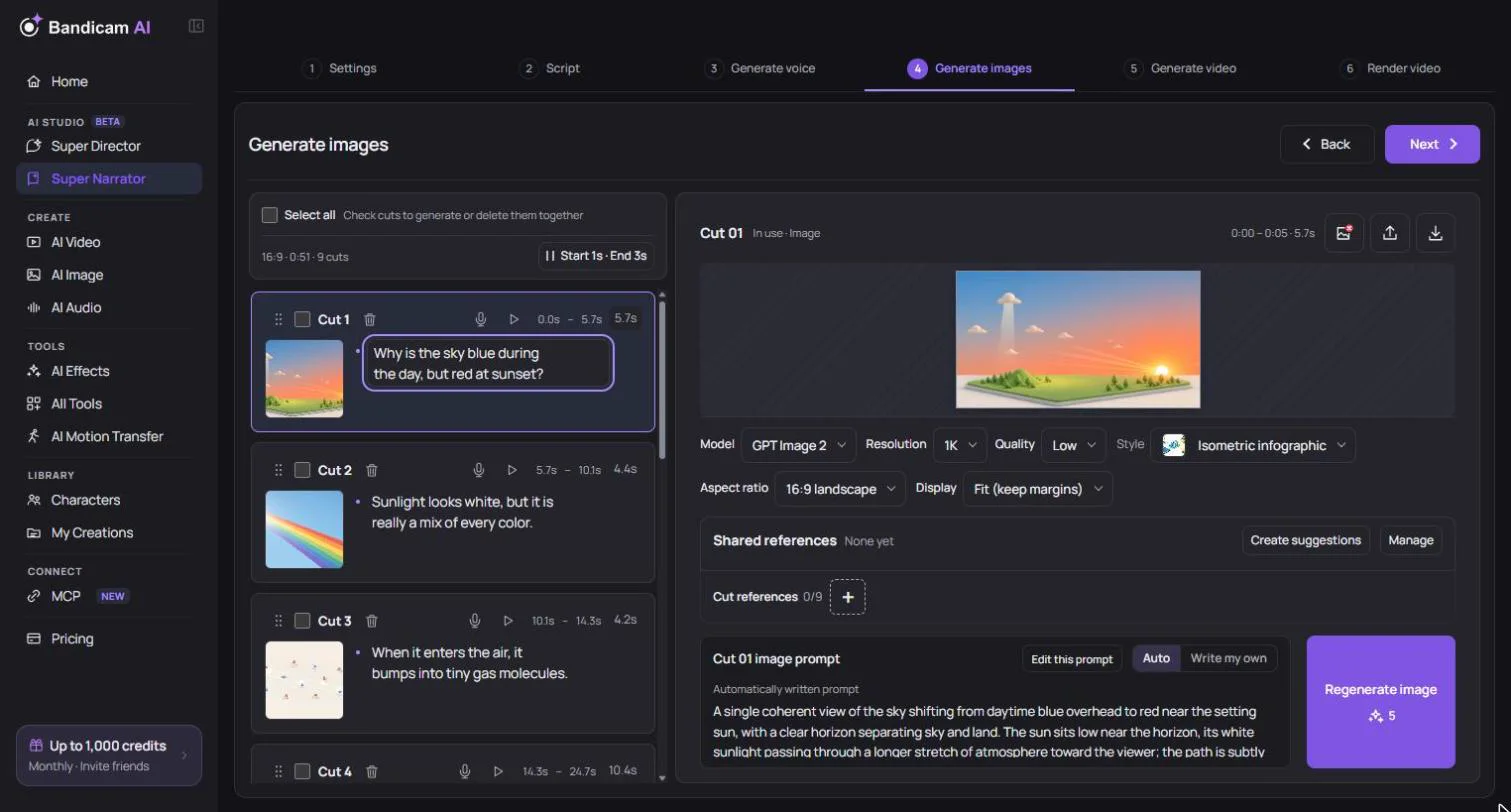
Generate all at once or one at a time
- Generate all missing cuts makes a picture for every cut that doesn’t have one. You’ll see the total price and confirm before it starts.
- To work on one cut, select it and press Generate image. Not happy? Regenerate image makes a new one.
- Already have a picture? Upload image or Choose from library.
- Tick several cuts to generate, regenerate or delete their pictures together, or to retry the ones that failed.
Image prompts
Each cut’s picture is described by an image prompt. By default it’s set to Auto and written for you from the cut’s narration when you generate. To describe the picture yourself, choose Write my own; your text is used as written. Auto-write gives you a draft to start from.
Image model
Each cut can use a different image model. Models differ in style, detail, text rendering and price; the price is shown on the button. Some models don’t support every aspect ratio, and a model that can’t use reference images is hidden when references are in use.
Fit or fill
If a picture’s shape doesn’t match the video, choose Fit (keep margins) to show all of it, or Fill (crop edges) to fill the frame.
Keep characters consistent
When the same person, animal or place appears in many cuts, you want it to look the same every time. Use shared references:
- Choose Analyze recurring characters. Super Narrator reads the script and lists who appears and in how many cuts.
- Choose Create suggested shared references. It makes a reference picture for the characters you select (up to 3 per image) and the main background, after you confirm the price.
- The references are attached to the cuts where they appear, so new pictures follow them.
You can also add your own references as a character, prop or background, with up to 9 images each, and up to 30 shared references per project. For a single cut, Add cut reference image attaches up to 9 extra images just for that cut; describe what to take from them, for example “Keep the person’s appearance from image 1.”
Step 5: Generate video
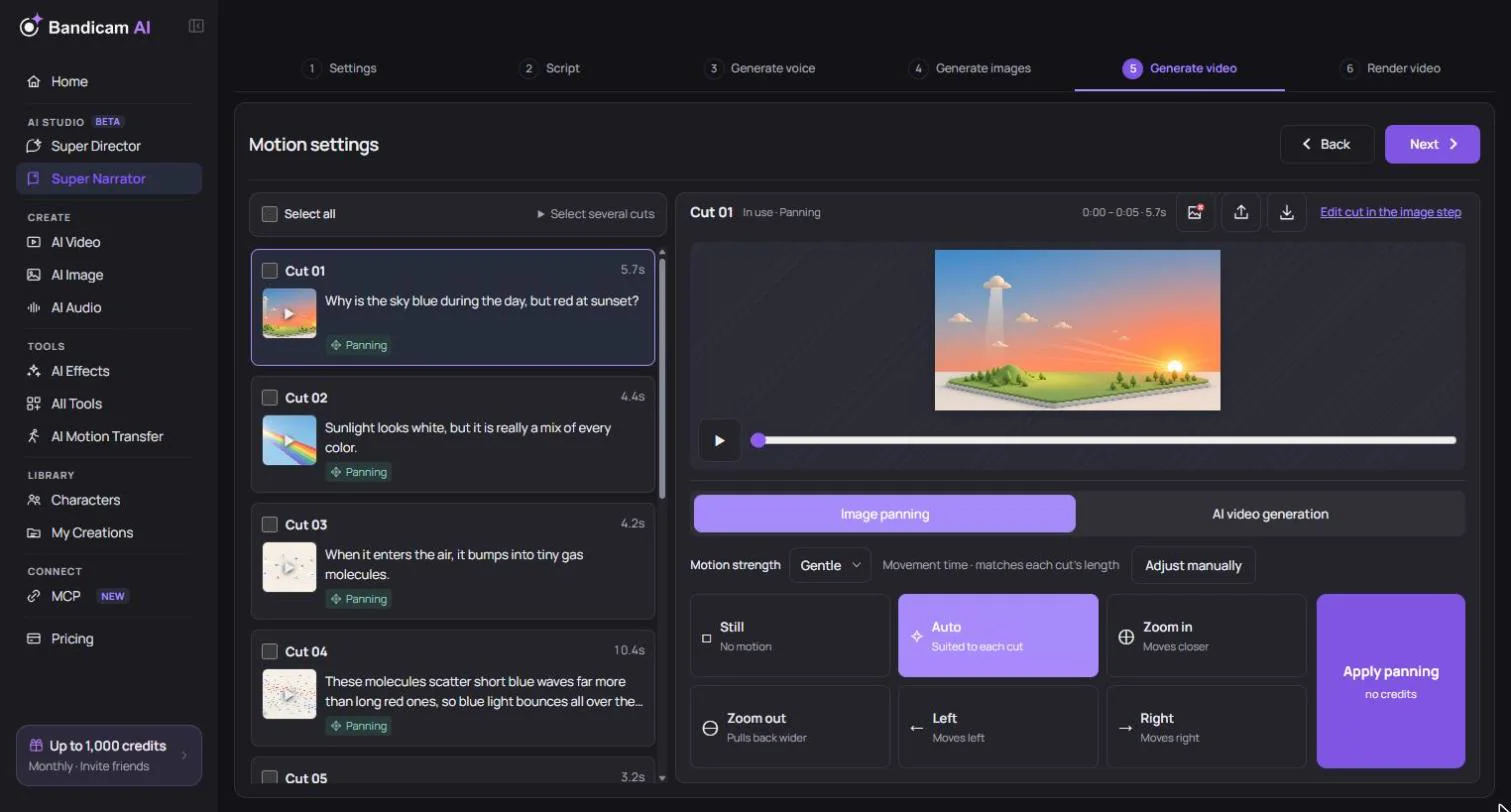
Choose a Motion mode:
| Mode | How it looks | Credits |
|---|---|---|
| Image panning | Each picture slowly zooms or slides so it feels like video: Auto, Zoom in, Zoom out, Left, Right or Still, with Gentle or Normal strength. | Free |
| AI video generation | The picture becomes a short AI video clip with real movement: people walk, water flows, the camera moves. | Charged per second by model and resolution |
You can mix both: pan most cuts and use AI video only for the key moments. Select several cuts to apply the same motion to all of them. Edit image panning lets you set the start and end framing of a cut yourself.
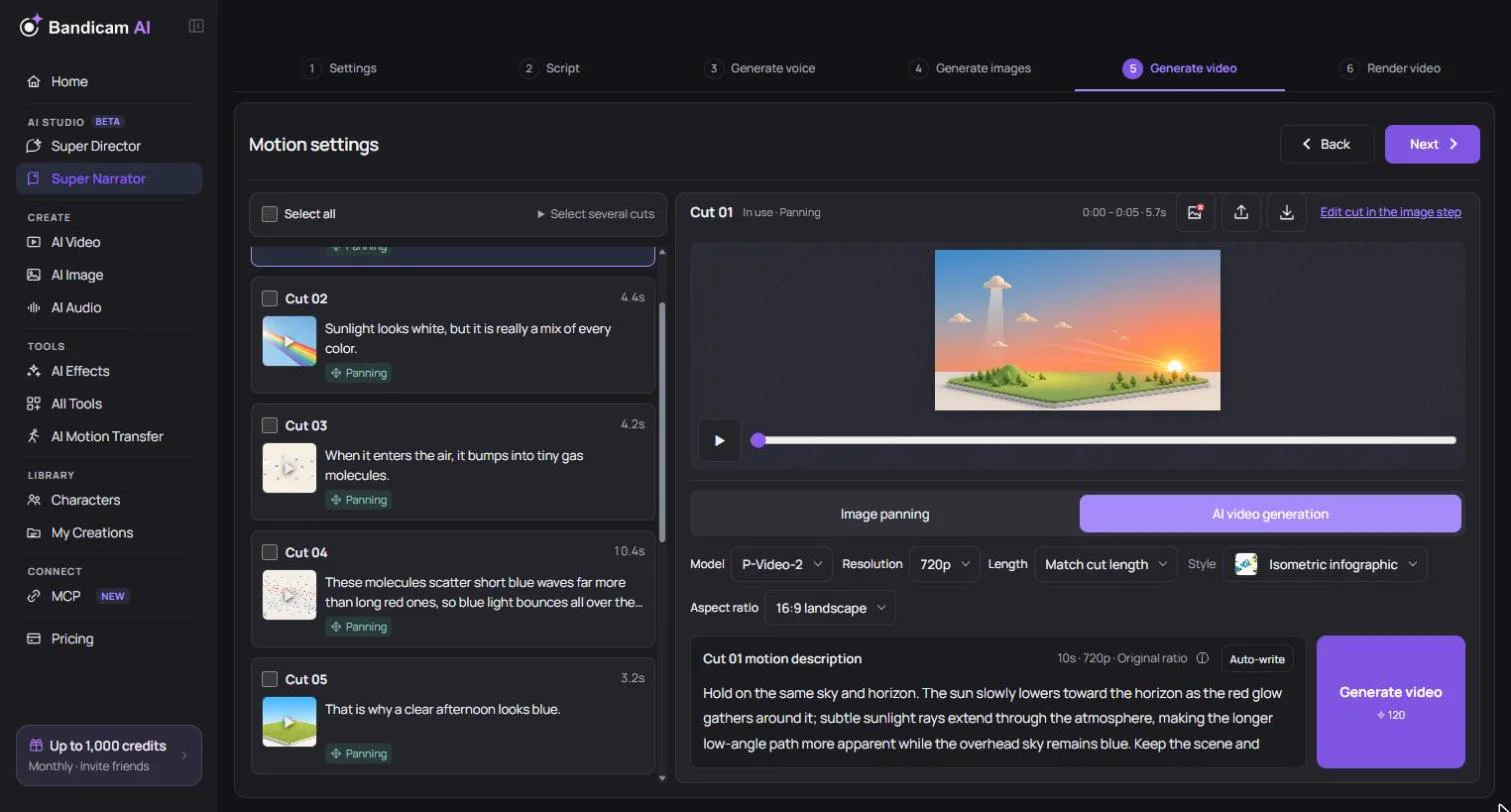
With AI video, choose the model and resolution (720p or 1080p). The motion description is written for you from the cut’s narration and picture, or you can write your own. If a cut is longer than the clip the model can make, the rest of the cut slowly zooms in on the last frame.