
Create your first AI video
This guide walks you through making a short clip in AI Video. It takes a few minutes, and you can try it with your free sign-up credits.
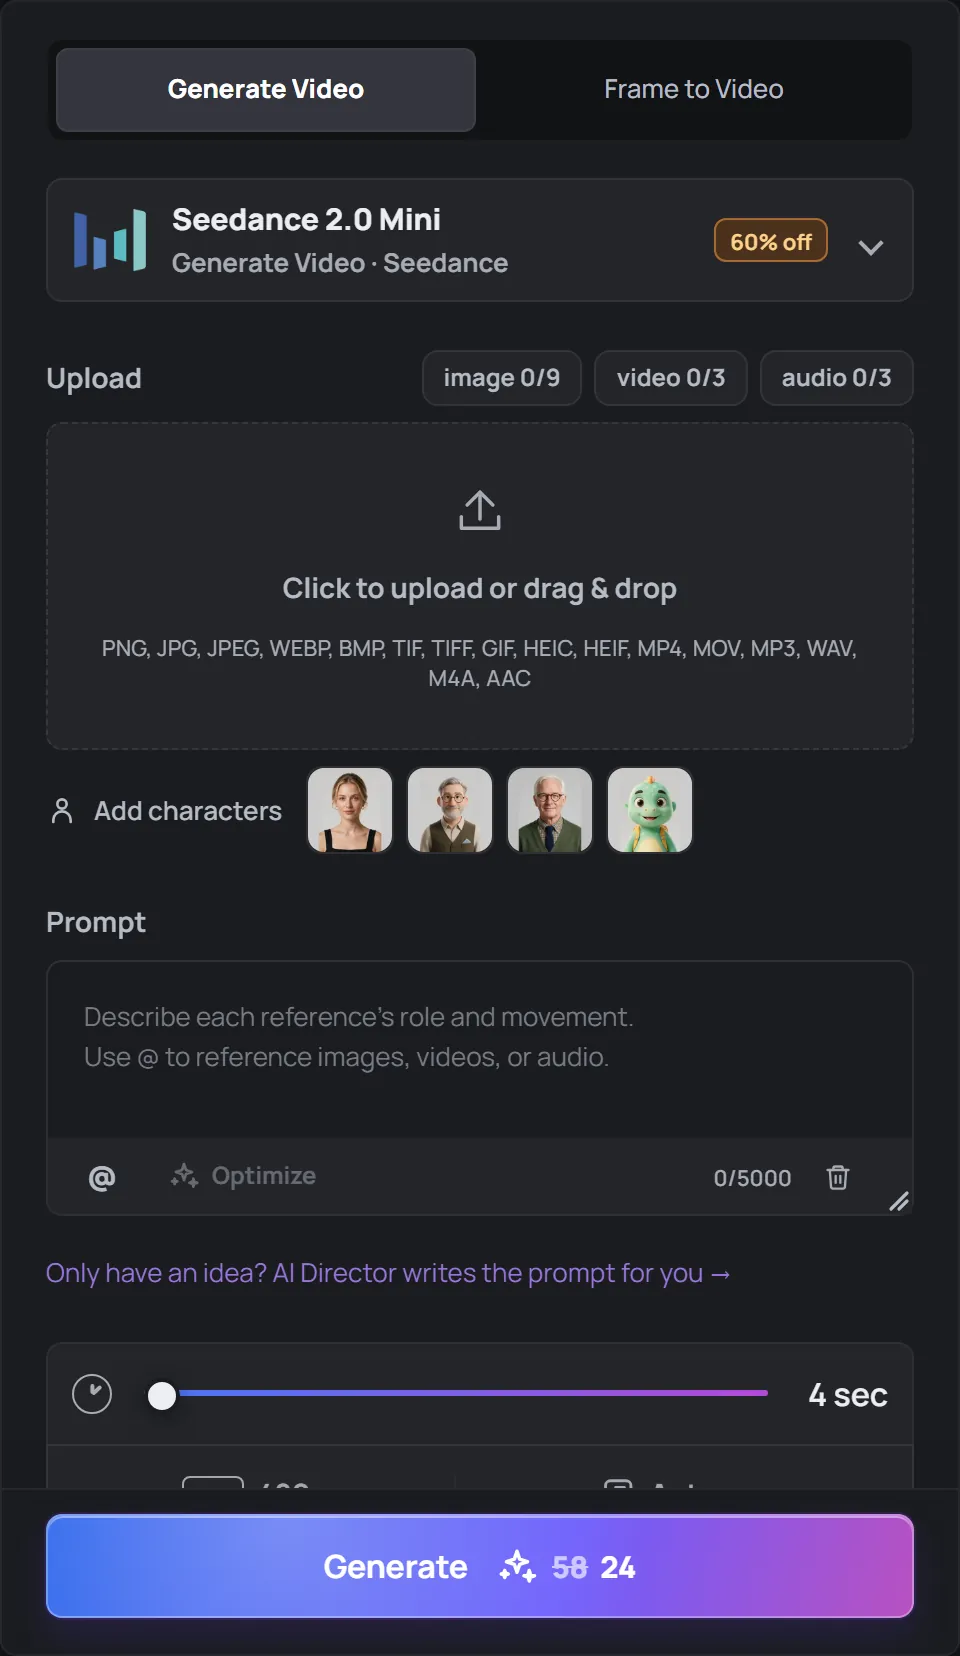
Step by step
- Open AI Video from the menu on the left.
- Choose a tab. Generate Video works from a text prompt, with optional reference images, videos or audio. Frame to Video animates a picture you upload as the first frame.
- Describe the scene. Say who or what is in it, what happens, and how the camera moves — for example: “A red fox walks through a snowy forest at sunrise, slow tracking shot.”
- Pick a model. A fast, low-cost model is selected by default, which is ideal for a first try. See AI Video and video models to compare.
- Set the options such as duration, resolution, aspect ratio and whether to include audio. The credit cost updates as you change them.
- Press Generate. Most clips take a few minutes. You can leave the page; the result is saved to My Creations.
Tips for a good first result
- Start short and small (for example 5 seconds at 480p), then make the version you like in higher resolution.
- Keep one scene per clip. Asking for many scene changes in a few seconds rarely works well.
- With Frame to Video, use a sharp image with the same aspect ratio you want for the video.
- Not sure what to write? Try AI Director (Beta): describe your idea in a chat and it prepares the prompt and settings for you. You’re only charged when you choose to generate.
Some models don’t accept uploaded photos of real people. If your image is rejected, see A generation failed or was blocked.