
Screenshots are powerful tools for capturing visual information, but it’s essential to protect sensitive data before sharing them. For example, imagine you’ve captured a screenshot of an essential document, a secret family recipe, or a social media conversation. However, such a screenshot may contain sensitive information like passwords, personal details, or private messages that you need to hide before sharing it. In such cases, it becomes necessary to blur a screenshot to maintain privacy.
In this detailed blog post, we’ll show you how to blur a screenshot on Windows, Mac, and your phone, whether iOS or Android. Stay tuned for a knowledgeable read and dive into these handy blurring techniques!
How to Blur a Screenshot on Windows
Bandicam is one of the go-to software for many Windows users to blur, hide, or pixelate any unwanted and sensitive parts of their images. With Bandicam, users can easily blur out any part of their screen and then capture a screenshot or screen recording. Bandicam 2025 was recently introduced with a blur feature to help users hide people’s faces or personal and sensitive information, including names, bank account numbers, addresses, passwords, and license plates. This new blur feature allows users to hide parts of their screen and record videos without a fuss.
Check out how to blur a screenshot or parts of your screen while screen recording with Bandicam on Windows.
Step 1: Download and launch the Bandicam Screen Recorder on Windows.
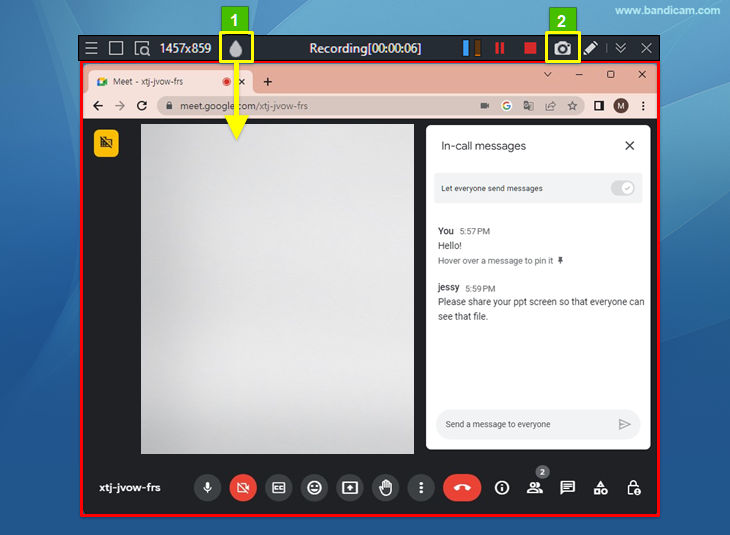
Step 2: Choose the Select a recording area option or the Rectangle on a screen option, and click the blur icon, as shown below.

Step 3: You can quickly take a screenshot by clicking the camera icon or start recording by pressing the ● REC button.
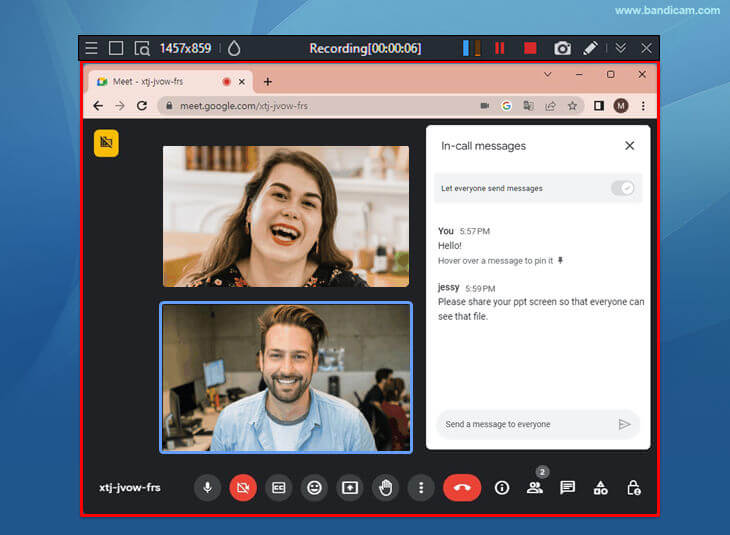
For example, when capturing a screenshot of a chat screen during an online meeting, you can apply a blur effect to hide private details, such as participants’ faces or usernames, before saving the image by clicking the camera icon. You can also capture a screenshot with the Ctrl + C shortcut and paste it with Ctrl + V in programs like Paint, PowerPoint, Word, etc.
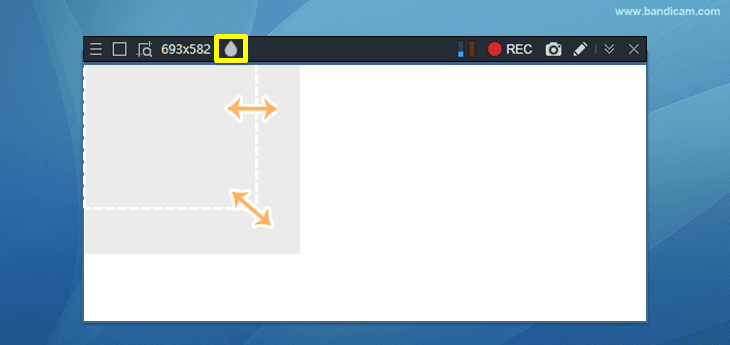
You can modify the size and position of the mosaic overlay as per your specific requirements. To adjust the size, place the mouse cursor on the corner of the mosaic overlay. To move the position, click and hold the mouse in the center of the mosaic overlay.
Step 4: Go to Home -> and click the Images tab to check or upload the captured images to YouTube or Google Drive.

How to Blur a Screenshot on Mac
Like Windows users, even Mac users can hide, blur, or pixelate sensitive parts of a photo or screenshot using built-in tools on their Mac computers. For example, you can use Apple’s Preview app or the Retouch tool in the Apple Photos app to blur parts of an image.
Apple’s Preview app is preinstalled on every Mac computer. It is an incredible tool that helps you open and access files and edit them in minutes. It also comes with a Shape tool that can be used to hide sensitive parts of a photo, while the Color Picker tool lets you cover areas with a color that matches a specific section of the image.
While there are several methods available, let’s walk through how to blur a screenshot on a Mac using Apple’s Preview app in just a few simple clicks.
Step 1: Open a picture or screenshot in the Preview app, and click the Markup icon.

Step 2: Select the Shapes icon and pick a shape, such as a square. You can change the color that’s used inside the shape.

Step 3: Once you have created a solid shape, drag it over the section or part of the image you want to cover. Use the eight dots on the edge of the shape to adjust its size. Preferably, you can copy and paste this shape to duplicate it and move it around or change its color as needed.

Step 4: Once you finish covering the sensitive parts of your image, click the red close window button on the top left corner of the window to save the changes.
How to Blur a Screenshot on Your Phone
Another way to blur a screenshot on your smartphone, say, on your iOS device, is by using the built-in Markup feature in the Photos app. This tool lets you blur out parts of an image, such as faces or sensitive content. Markup doesn’t have a dedicated blur tool, but you can create a blurred effect using a soft brush or highlighter tool, providing a simple way to protect your privacy or highlight specific elements of your photo.
Let’s find out how to blur text on an iPhone.
Step 1: To begin, open your iPhone’s Photos app.
Step 2: Choose the screenshot or image you want to edit and blur.
Step 3: Hit the Edit button at the bottom of your phone’s screen.
Step 4: Tap the Marker icon located at the upper right corner of the screen.
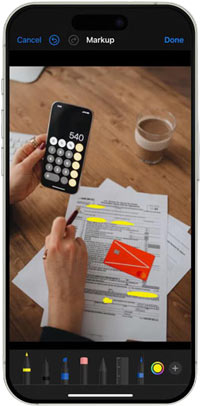
You will now be in Markup. At the bottom side of your phone’s screen, you will have multiple tools to choose from. The fastest strategy is to use a marker, pencil, crayon, etc., to quickly scribble over what you need to cover or blur.
Step 5: After finalizing the blur effect and covering the essentials, tap Done to save your image.
You can edit photos on your Android phone similarly to your iPhone to add a blur effect.
Summary
Many users capture screenshots of important documents and images for future reference, but it’s important to exercise caution before sharing them with others or posting them online. Pixelating or blurring photos and screenshots is an easy and effective way to protect your information. We’ve walked you through the best methods and apps for blurring screenshots on Windows, Mac, iOS, and Android, ensuring you have a solution for every device. If you’re still unsure how to blur a screenshot on Windows, we recommend using Bandicam 2025, which not only helps blur your screen but also handles other video-related screen recording tasks.

