Recording internal audio on Mac can be confusing because Apple’s built-in tools do not directly capture system sound. You can record microphone audio easily, but if you want to record internal audio or system audio, you usually need either a virtual audio driver such as BlackHole or a screen recorder that supports it natively.
In this guide, we’ll show you two practical ways to record internal audio on Mac: an easy method with Bandicam for Mac and a free method using QuickTime Player with BlackHole.
Quick Answer
If you want the easiest way to record internal audio on Mac, use a screen recorder that supports system audio natively. If you want a free option, you can use QuickTime Player together with BlackHole, which routes your Mac’s internal sound into QuickTime as an input source.
For most users, the main difference is simple:
- QuickTime + BlackHole: free, but requires manual setup and audio routing
- Bandicam for Mac: easier setup, records system audio and microphone together
Bandicam vs. Other Tools: A Quick Comparison
Compare Bandicam for Mac with other tools like BlackHole or Loopback to see which works best for recording internal audio.
| Feature | BlackHole / Loopback | Bandicam for Mac |
|---|---|---|
| System Audio | Requires a virtual audio driver | ✅ Built-in |
| Mic + System | Manual routing | ✅ Simultaneous |
| Setup Time | 10–15 minutes | ✅ 1 minute |
| Maintenance | May need reconfiguration | ✅ No extra audio driver needed |
| Ease of Use | Complex for beginners | ✅ Very easy |
Table of contents
Record Internal Audio on Mac with Bandicam (No Plugin or Setup)
Bandicam for Mac is one of the easiest ways to record internal audio on Mac without installing a virtual audio driver. It can capture system audio directly, and you can also record microphone input at the same time when needed.
This makes it useful for recording video calls, online classes, presentations, tutorials, gameplay, and any screen activity where both system sound and voice narration matter.
Here is how to record internal audio on Mac with Bandicam:
- Download and install Bandicam for Mac from the App Store.
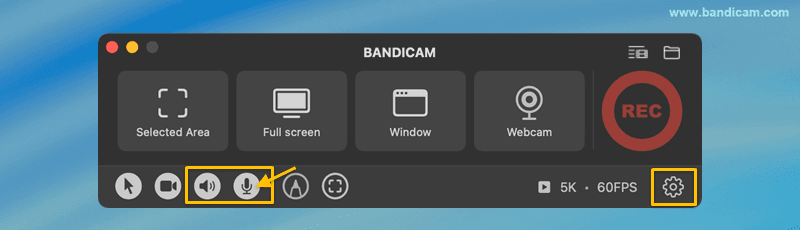
- Select your audio sources.
Open Bandicam and toggle the audio and microphone icons to record system sound and voice. To choose a specific mic, click the settings icon, go to the Video tab, and select it manually.
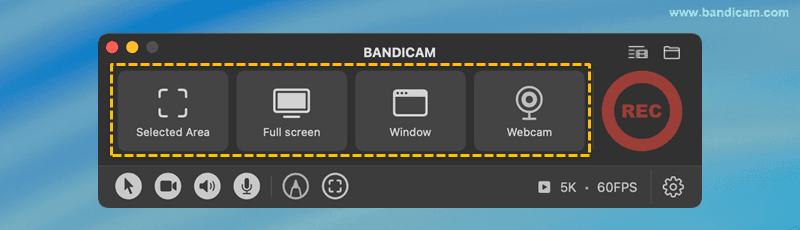
- Choose a recording mode such as Selected Area, Full Screen, Window, or Webcam.
- Click REC to start recording.
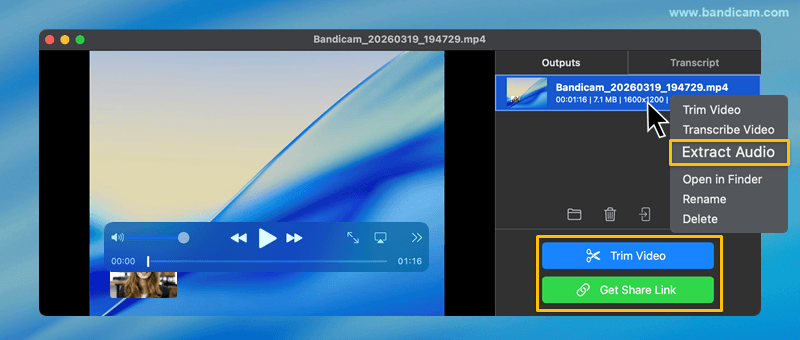
- Stop recording, review, and extract audio.
If you only need the sound, right-click the recorded video and choose Extract Audio to save the audio separately.
Why choose Bandicam for Mac?
- Records internal system audio without extra plugins
- Can record system audio and microphone together
- Works well for both simple and professional recording tasks
- Lets you extract audio after recording
Using Virtual Drivers to Record Internal Audio on Mac
If you want to record internal audio with QuickTime, you’ll need a virtual audio driver like BlackHole. It works by routing your Mac’s system sound into a virtual input, allowing recording apps to capture it as if it were coming from a microphone.
How to use BlackHole for QuickTime audio recording:
1. Download and install BlackHole from its official website.
2. Open Audio MIDI Setup → click “+” → select “Create Multi-Output Device.”

3. Select BlackHole and your main output device (e.g., MacBook Speakers).
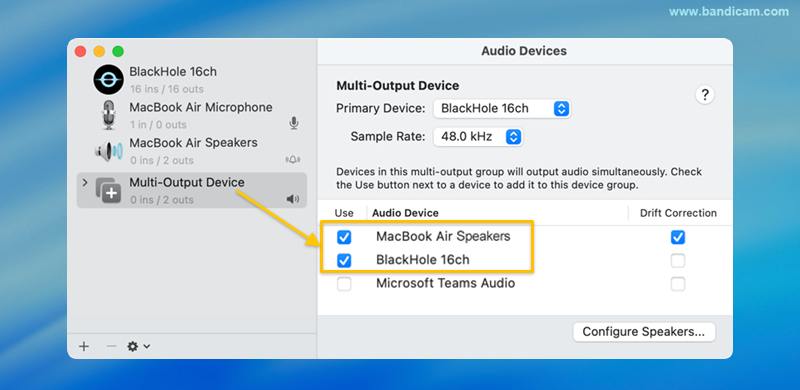
4. Set the Mac’s default sound output to the Multi-Output Device you just created.
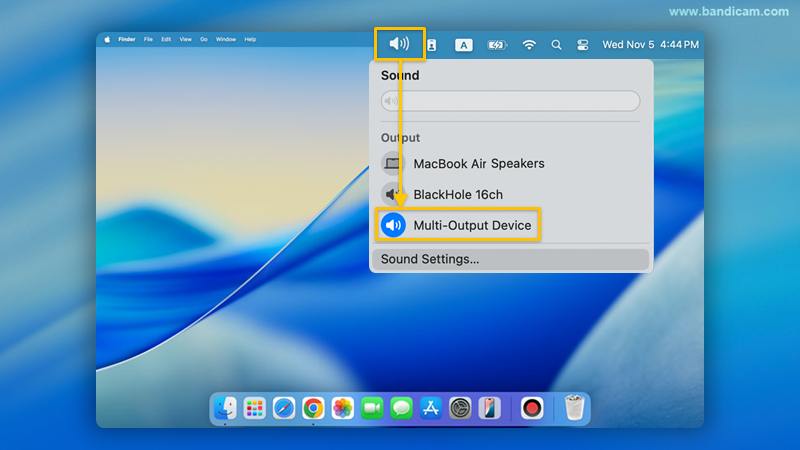
5. In QuickTime Player, choose BlackHole as the microphone input source and start recording.
While this method works, it requires extra configuration and may break after macOS updates. If you want a faster and more stable solution, Bandicam for Mac records system audio directly without any virtual driver or setup.
Limitations of the QuickTime + BlackHole method
- Setup is more complicated for beginners
- Audio routing must be configured manually
- Problems can happen after macOS updates or audio setting changes
- It is less convenient when you want to record system audio and microphone together quickly
Common Questions (FAQs)
Not by itself. QuickTime Player can easily record microphone input, but it does not directly capture internal system audio. To record internal audio with QuickTime, you need a virtual audio driver such as BlackHole.
A common free method is using QuickTime Player with BlackHole. BlackHole routes your Mac’s system sound into QuickTime so you can record internal audio without paying for extra software.
Yes. Some screen recorders such as Bandicam for Mac let you record system audio and microphone audio together. With free methods, this usually requires additional audio routing and setup.
macOS does not let most built-in apps capture system sound directly. That is why many users need either a virtual audio driver or a recorder that supports internal audio natively.
Summary
If you only want a free method, QuickTime Player with BlackHole can help you record internal audio on Mac, but the setup is more technical.
If you want a simpler and faster method, Bandicam for Mac can record internal audio natively without extra plugins or manual routing. For most users, that makes it the easier way to record Mac system audio and microphone audio together.

