Many Mac users discover the hard way that QuickTime can’t record system sound. You can install tools like BlackHole or Loopback, but they require extra setup and often break after macOS updates.
Why is recording Mac system audio so tricky — and what’s the easier way?
Because macOS blocks apps from recording system sound directly, capturing internal audio can be tricky. A simpler alternative is using screen recording software that supports internal audio capture natively — no plugins, no setup hassles.
In this article, we’ll first show you how to record internal audio on Mac with no extra setup using Bandicam, then briefly cover virtual drivers like BlackHole as an alternative option.
Bandicam vs. Other Tools: A Quick Comparison
Compare Bandicam for Mac with other tools like BlackHole or Loopback to see which works best for recording internal audio.
| Feature | BlackHole / Loopback | Bandicam for Mac |
|---|---|---|
| System Audio | Requires plugin | ✅ Built-in |
| Mic + System | Manual routing | ✅ Simultaneous |
| Setup Time | 10–15 minutes | ✅ 1 minute |
| macOS Updates | May require reinstallation | ✅ Always stable |
| Ease of Use | Complex for beginners | ✅ Very easy |
Table of contents
Record Internal Audio on Mac with Bandicam (No Plugin or Setup)
Bandicam for Mac is designed specifically to be the solution you’re looking for. It’s a powerful screen recorder that natively captures your Mac’s internal audio without requiring you to download or configure any separate, complicated virtual drivers.
Here is how to record your screen with audio on Mac:
- Download and install Bandicam for Mac from the App Store.
- Select your audio sources.
Open Bandicam and toggle the audio and microphone icons to record system sound and voice. To choose a specific mic, click the settings icon, go to the Video tab, and select it manually.
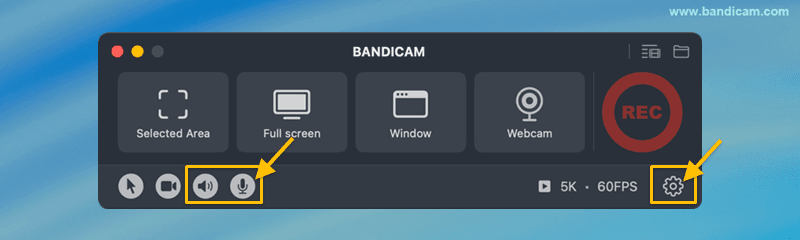
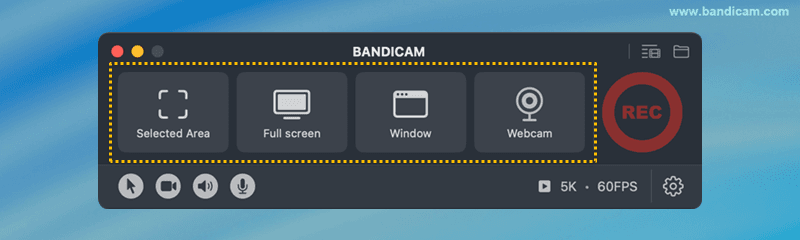
- Choose the recording method and record.
Select the recording mode you want (selected area, full screen, window, or webcam) and press the “REC” button.
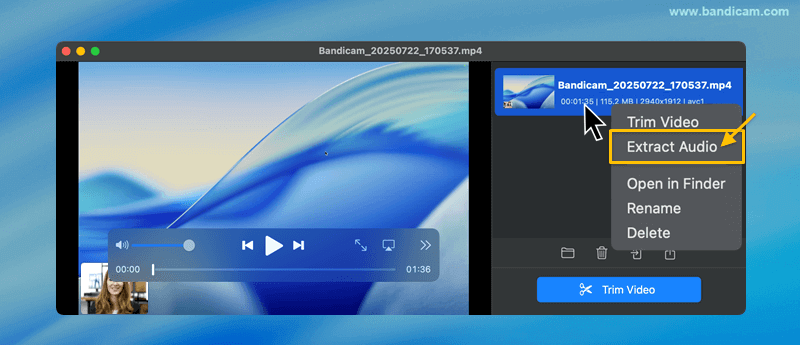
- Stop recording, review, and extract audio.
After you stop recording, the output video list window will appear automatically. Right-click the recorded video and select “Extract Audio” to save the audio separately.
Using Virtual Drivers to Record Internal Audio on Mac
If you want to record internal audio with QuickTime, you’ll need a virtual audio driver like BlackHole. It works by routing your Mac’s system sound into a virtual input, allowing recording apps to capture it as if it were coming from a microphone.
How to use BlackHole for QuickTime audio recording:
1. Download and install BlackHole from its official website.
2. Open Audio MIDI Setup → click “+” → select “Create Multi-Output Device.”

3. Select BlackHole and your main output device (e.g., MacBook Speakers).
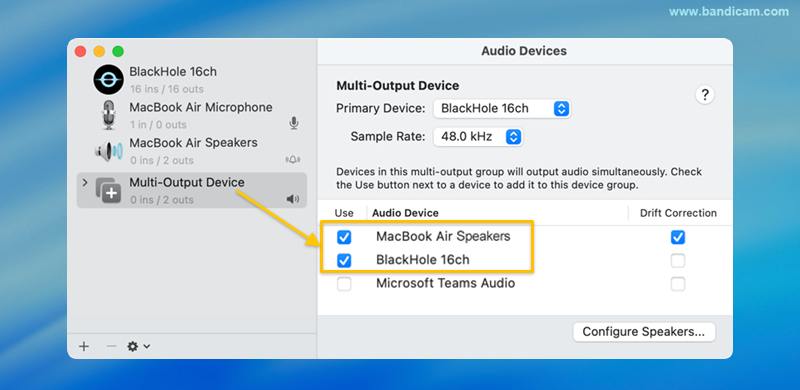
4. Set the Mac’s default sound output to the Multi-Output Device you just created.
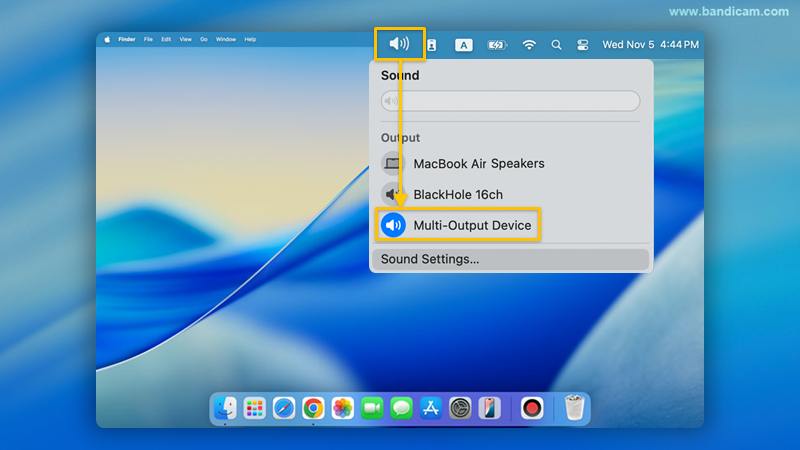
5. In QuickTime Player, choose BlackHole as the microphone input source and start recording.
While this method works, it requires extra configuration and may break after macOS updates. If you want a faster and more stable solution, Bandicam for Mac records system audio directly without any virtual driver or setup.
Common Questions (FAQs)
No. QuickTime Player can only capture microphone input. To include system audio, you’ll need a third-party tool like Bandicam or a virtual driver.
No. Bandicam for Mac records system and mic audio natively, without any extra plugin or setup.
Yes, using BlackHole or Loopback — but setup can be tricky. Bandicam offers a faster, more reliable solution.
Summary
Recording internal audio on Mac is difficult by default because macOS doesn’t let apps capture system sound directly. You can work around this limitation by using virtual drivers like BlackHole or Loopback, but they require extra setup and can break after macOS updates.
Bandicam for Mac offers a simpler approach: it records both system audio and microphone natively, without any additional plugins or complex routing. For most users who just want reliable Mac screen recording with internal audio, it’s the most straightforward option.

